Installation and Removal of CPV’s New Handles
The process of installing and removing our new ergonomic valve handles for the full-size range of O-SEAL® and G-Series® product lines is so simple it can be done in under a minute! The ease of installation can be seen below in the step by step tutorial.
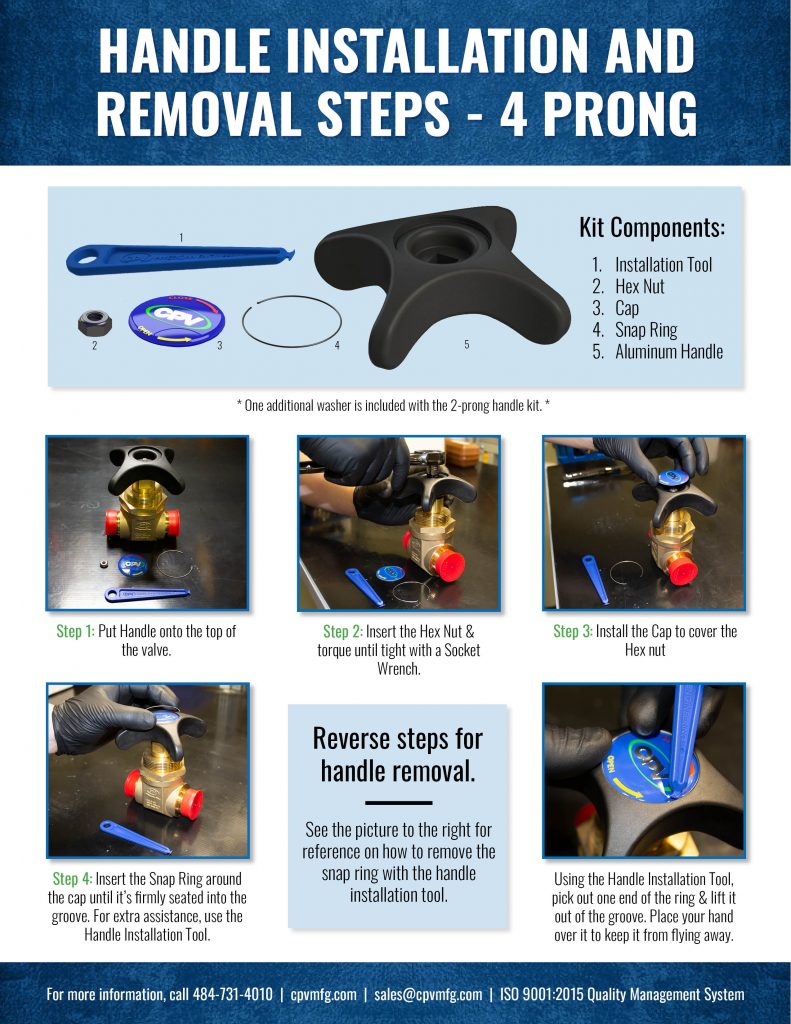
This specific bulletin shows the installation of a 4-prong valve handle; however, the same steps apply to our 2-prong valve handles. The only difference is and additional step due to an extra washer in the replacement kit, also shown below. During installation and removal of a 2-prong handle, the extra step would occur after step 2 for both.
For extra guidance, we have listed all the removal steps below and made an in-depth YouTube tutorial showing just how simple the installation and removal of our new valve handles really are!
Removal Steps:
Step 1: Using the Handle Installation Tool, pick out one end of the Snap Ring and lift it out of the groove. Be sure to place your hand over the ring to keep it from flying away and becoming lost.
Step 2: Remove the Cap covering the Hex Nut.
Step 3: Remove the Hex Nut with a Socket Wrench. The handle should then come right off the valve.
Feel free to contact us at Sales@cpvmfg.com or 484.731.4010 if you have any other questions!
 CPV Manufacturing was founded in 1915 as a one-man business, manufacturing replacement valves for steam-driven reciprocating pumps. Today, CPV is recognized worldwide for its high-quality valves and fittings and dedication to state-of-the-art design, equipment, safety, and reliability. CPV Manufacturing’s valves withstand the high tolerances required by the maritime, industrial gas, and petrochemical industries. Based out of Kennett Square, PA, USA, CPV has a complete facility for developing, manufacturing, and testing its products. Dedicated workers and global partnerships allow CPV to be a market leader.
About the Author:
Joshua Raizman
Senior Applications Engineer